In the heart of every home, the kitchen stands as a sanctuary of warmth and creativity, where the simple alchemy of flour and water transforms into the comfort of freshly baked bread. Yet, for those embracing a gluten-free lifestyle, this cherished ritual can often feel elusive, as if the joy of breadmaking is just out of reach. Fear not, for this journey into gluten-free baking is paved with promise and delight. As we embark on this culinary adventure, you’ll discover that creating gluten-free bread at home is not just a possibility but a celebration of flavors and textures waiting to be explored. With a pinch of patience and a dash of enthusiasm, let’s turn your kitchen into a haven where gluten-free bread rises to the occasion, offering a slice of hope and happiness with every bite. Welcome to the art of gluten-free breadmaking—where tradition meets innovation and every loaf tells a story of resilience and joy.
Understanding Gluten Free Flours and Their Unique Qualities
Embarking on the journey of gluten-free baking opens up a world of diverse flours, each with its own character and charm. Unlike the uniformity of all-purpose flour, gluten-free options offer a tapestry of flavors and textures that can transform your homemade bread into a unique culinary experience. Almond flour, for instance, brings a nutty richness and a moist crumb, perfect for those who enjoy a hint of sweetness. Coconut flour, on the other hand, is highly absorbent and lends a mild tropical flavor, but it requires more liquid and eggs to balance its dryness.
Sorghum flour and teff flour are excellent choices for those seeking a heartier taste, offering a robust, earthy note that complements savory loaves. If you’re aiming for a more neutral base, rice flour and tapioca starch provide a versatile canvas, ideal for blending with other flours to achieve the desired consistency. Here’s a glimpse of their unique qualities:
- Almond Flour: Adds moisture and a subtle sweetness.
- Coconut Flour: Highly absorbent, requires additional liquid.
- Sorghum Flour: Earthy and hearty, enhances flavor depth.
- Teff Flour: Nutty with a hint of molasses.
- Rice Flour: Light and neutral, perfect for blending.
- Tapioca Starch: Adds chewiness and elasticity.
Understanding these distinct characteristics allows you to craft a gluten-free bread that not only meets your dietary needs but also delights your taste buds.

Mastering the Art of Kneading and Rising for Perfect Texture
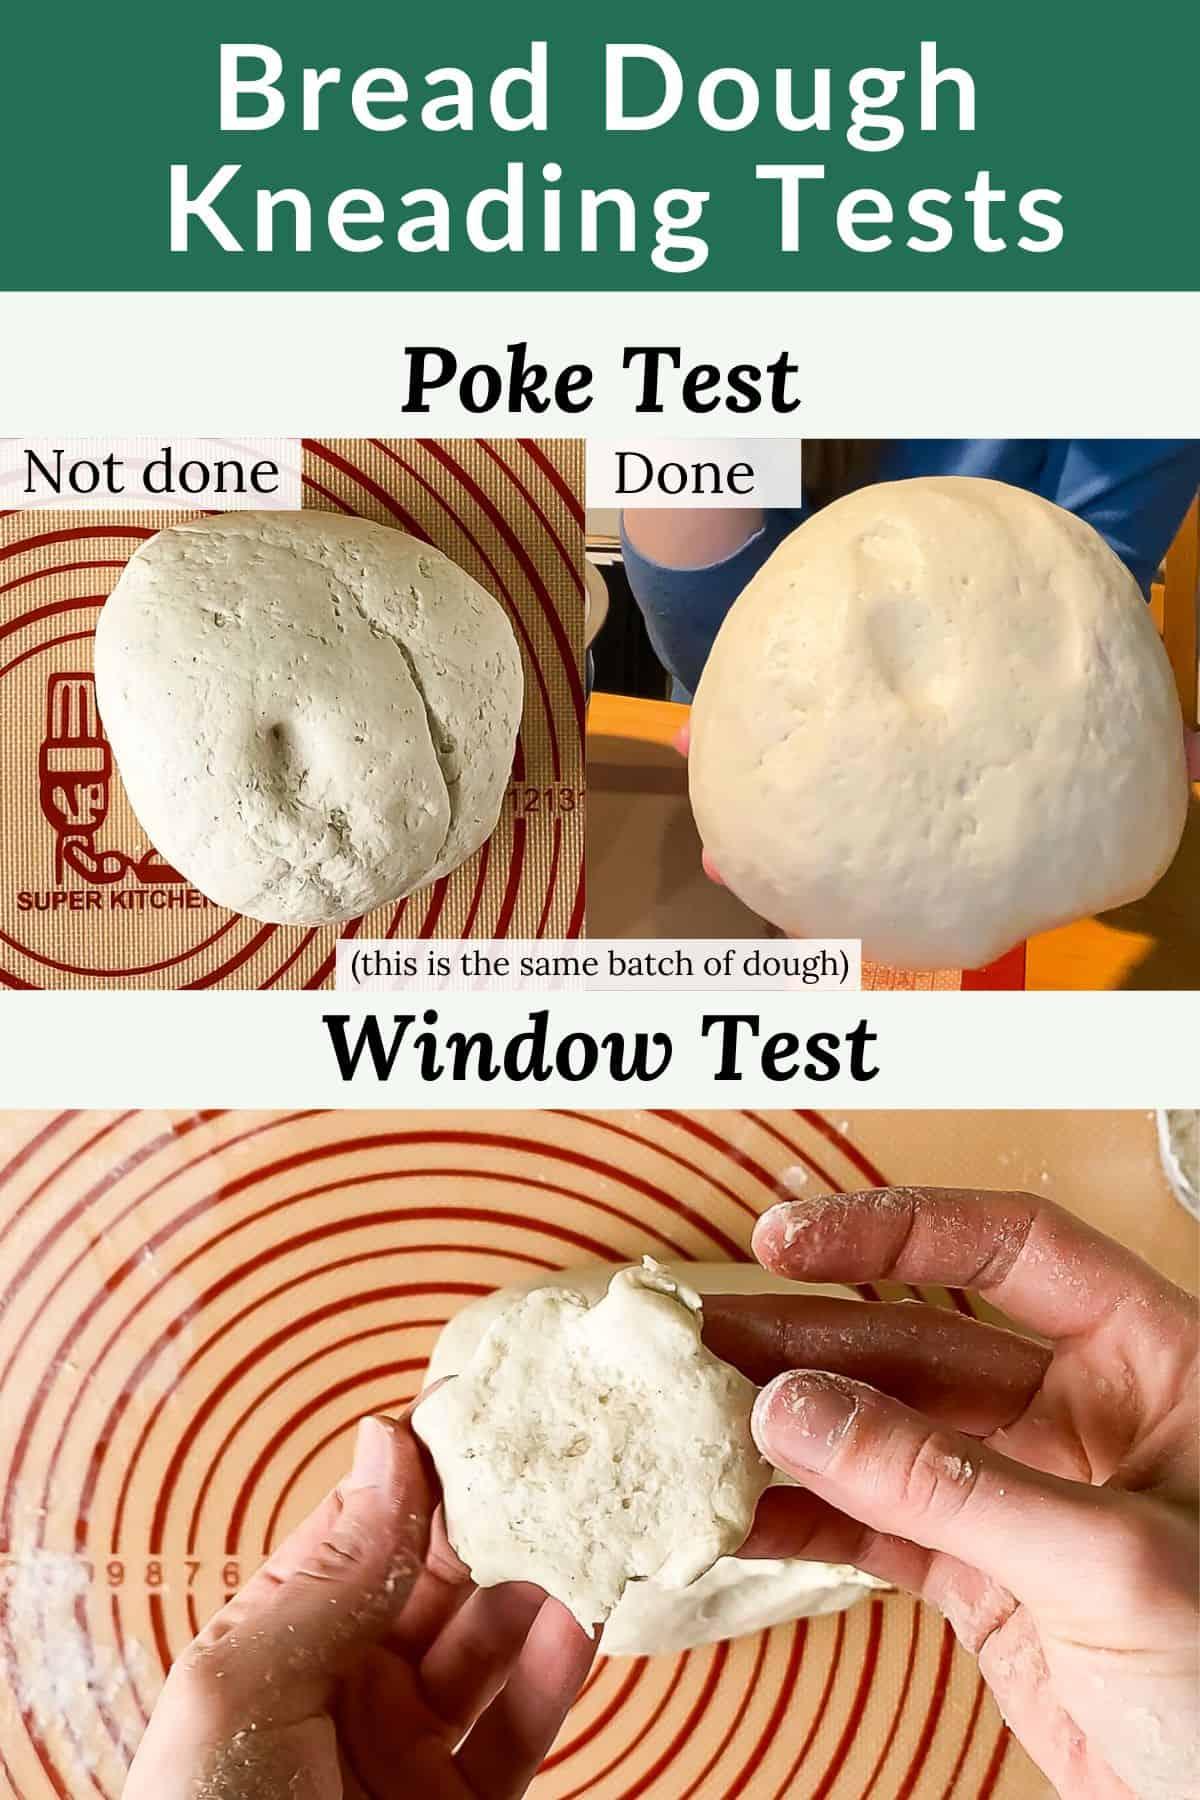
Transforming a simple mix of gluten-free flours into a loaf with the perfect crumb is both an art and a science. At the heart of this process is the magical combination of kneading and rising. Kneading gluten-free dough may not involve the traditional elasticity associated with gluten, but it’s all about evenly distributing moisture and activating the binding agents. With the right touch, you’ll ensure a dough that’s smooth and well-mixed.
When it comes to the rising phase, patience is your best friend. Allowing the dough to rest and rise in a warm, humid environment can make all the difference. Here are a few tips to master this crucial step:
- Create a warm environment by preheating your oven to the lowest setting, then turning it off before placing the dough inside to rise.
- Use a damp cloth to cover your dough, helping to maintain moisture.
- Be patient; gluten-free dough often requires a longer rising time than traditional doughs.
With these techniques, your gluten-free bread will rise to the occasion, offering a texture that’s both hearty and satisfying.

Choosing the Right Baking Tools for Flawless Results
To achieve the perfect gluten-free bread, it’s essential to arm yourself with the right tools. The journey to flawless results begins with a few key items in your kitchen arsenal. Mixing bowls made of glass or stainless steel provide a non-reactive environment, ensuring your ingredients blend seamlessly. A high-quality stand mixer can be your best friend, saving time and energy while guaranteeing a smooth, consistent dough.
Consider investing in a reliable digital kitchen scale. Accurate measurements are crucial in gluten-free baking, where the balance of ingredients can make or break your loaf. When it comes to baking pans, choose non-stick loaf pans or line them with parchment paper to prevent sticking. Lastly, a cooling rack is indispensable, allowing your bread to cool evenly and avoid a soggy bottom. Equip yourself with these tools, and you’ll be well on your way to baking gluten-free bread that’s both delicious and delightful.

Creative Flavor Enhancements to Elevate Your Gluten Free Bread
Transform your gluten-free bread into a culinary masterpiece with some imaginative flavor enhancements that will delight your taste buds. Start by infusing your dough with a burst of aromatic herbs and spices. Consider adding rosemary, thyme, or a pinch of garlic powder for a savory twist. For those with a penchant for sweet flavors, a sprinkle of cinnamon or nutmeg can turn your bread into a delightful treat.
- Seeds and Nuts: Add a crunchy texture by folding in chia seeds, flaxseeds, or chopped walnuts.
- Cheese: Grate some Parmesan or cheddar into the mix for a rich, cheesy flavor.
- Dried Fruits: Incorporate raisins, cranberries, or apricots for a hint of natural sweetness.
- Citrus Zest: Brighten up your loaf with a touch of lemon or orange zest.
Don’t shy away from experimenting with flavored oils like basil or chili oil to add depth and character to your bread. A dash of honey or maple syrup can also work wonders, balancing flavors and adding moisture. With these creative additions, your gluten-free bread will not only rise to the occasion but also leave a lasting impression.


